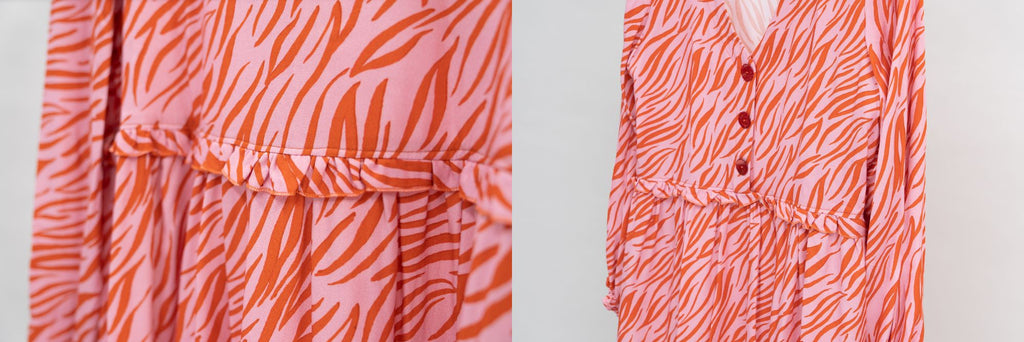
If you saw our Date Night outfit inspo blog, then you will have seen that our very lovely (and VERY talented) Pattern Cutter Hayley has been at it again… adding fabulous hacks to our patterns! This time, adding a cute frill to the bodice of her Jessica Dress.
You all loved it so much, we asked Hayley to show us how she did it. So here it is…
7 simple steps on how to add a frill to your Jessica Dress bodice
Note: You can add this frill to both your Jessica pattern and your Jessica Hacks pattern as well as other sewing patterns!
Hayley started her frill hack from point 13 from the Jessica Pattern instructions.
Instructions key

At point 13, you will now have a fabulously finished bodice (yay! you’re halfway there!)
To add an extra frill in the seam, follow these simple instructions to create an extra frill in the seam of the bodice.
Step 1
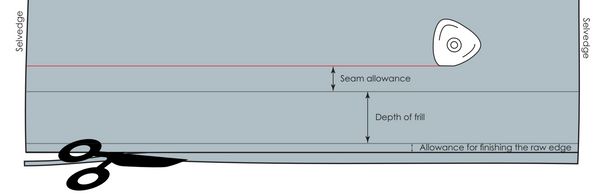
Decide on how deep you would like the frill (l choose to use __cms), add a 1.5cm seam allowance. Also think about how the raw edge will be finished and add on any allowance needed - this measurement will be how deep the frill will be cut.
Step 2
Measure the opening of your Jessica bodice, times this measurement by 1.5 or 2 (depending upon the gather you would like - I used x2), this will be the length of the fabric strip that will need to be cut.
Step 3
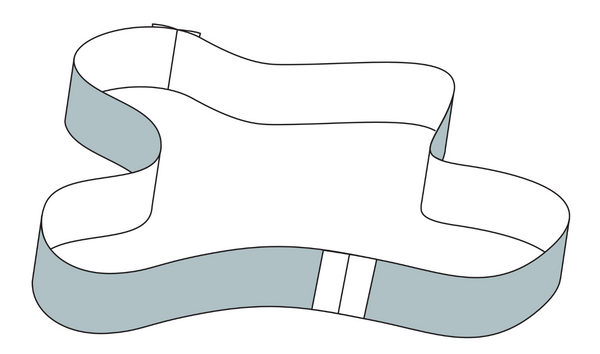
Now you have the length and depth of the frill needed, cut this out in fabric. You will probably need to join more than one strip of fabric together so remember to add seam allowance at the ends and sew together and press open. Sew the ends together and press open so you are left with a long circular strip of fabric.

Step 4
Firstly, it is best to finish the raw edge/bottom of the frill - I decided to use the overlocker rolled hem function as it gives a tiny covered stitch encasing the raw edge (this is covered in the ‘love your overlocker’ workshop by visitng our workshop calendar, or, if you can’t make it to a face-to-face workshop, why not sign up our Online Sewing Studio subscription and learn how to sew a roll hem on your overlocker from there?). Alternatively, use the rolled hem foot on your sewing machine to create a small turned over hem.
Step 5
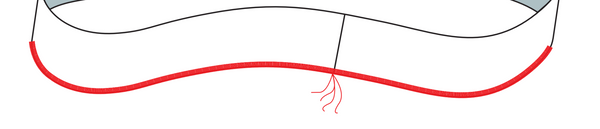
Sew a double row of long gathering stitches across the top of the frill, starting and stopping 1 cm from the ends.

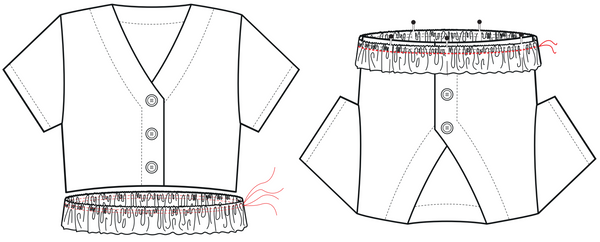
Step 6
Gently pull at the gathered stitches so that the frill fits the bodice. Spread the gathering evenly and pin into place and sew into the bodice. If any gathering threads are visible on the outer garment pull them out.
Step 7
Now you can continue with the instructions to make the skirt. Be careful when attaching the bodice with frill to the skirt that the frill isn’t caught in your sewing.
So there you have it. Another way to add that extra bit of sass to an already fabulous dress pattern.
Will you be adding one to your Jessica? If you do, share your pics with us by tagging us on Instagram @sewmesomething and using the hashtags #jessicadress #smspatterns
Need help with sewing jargon? No problem! Check out our A-Z Glossary Of Sewing Terms here.